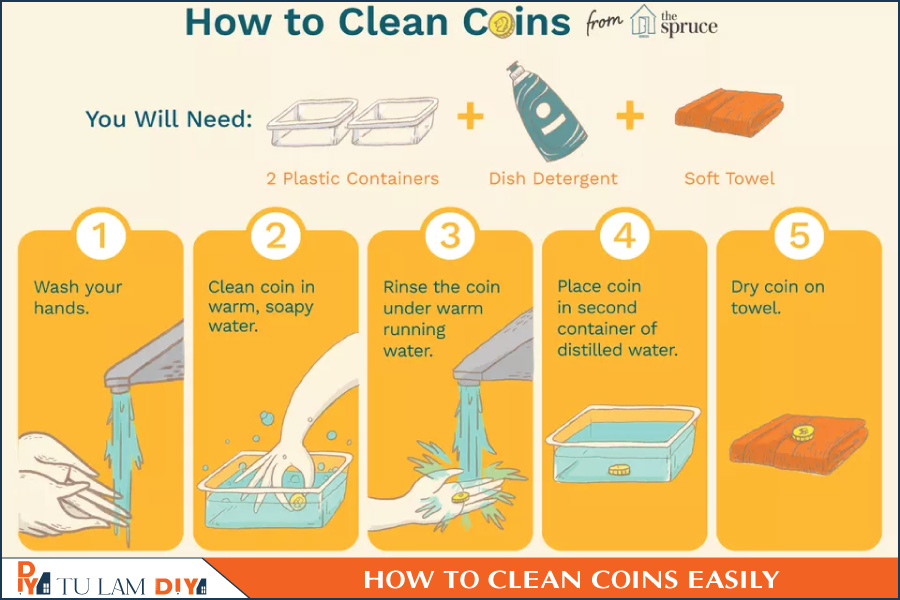
While cleaning coins is not recommended, if you feel you must clean your coins then please follow the steps described below to minimize the risk of damaging them. Never use metal polish or acid dip to clean coins! Using these chemicals will cause abrasions or chemical reactions with the metal which will permanently damage your coin. This damage can never be fixed or undone. Additionally, these chemicals can be caustic and cause injury or even death.
Safety should be your number one concern. Any cleaning task, no matter how small or how big can have the potential to cause harm. Children must be supervised by a responsible adult if they are going to partake in this activity. Even a small amount of dish soap spilled on the floor can cause a slip that could lead to injury. Once you have a safe environment, have fun cleaning your coins!
Contents:

1. Reasons to Clean Coins
One of the only times that you would ever want to clean coins would be if you were helping a young coin collector begin a coin collection from circulating coins. Circulating coins can be filthy and carry germs, and this is the only instance in which a beginning coin collector should clean coins.
Note: Never clean old coins you have found or inherited! There are endless stories of people who have inherited valuable coins and have erased thousands of dollars of value by improperly cleaning their inherited coins. If you don’t know what you have, please take them to a coin dealer at a coin shop or coin show before you proceed to clean them.
2. What You’ll Need
Equipment / Tools
- Two small plastic containers
- A soft clean towel
- Access to running tap water
Materials
- Mild dish detergent
- Distilled water
- Rubbing alcohol (optional)

Instructions
1. Wash Your Hands
Washing your hands with soap will remove the oils and tiny grit from your fingers.
2. Lay Down a Soft Towel
Place a soft cloth or towel, folded over a couple of times, on your working surface to catch coins you might drop and provide a space for them to dry
3. Set Up a Soapy Bath
Fill a small plastic container with warm tap water. Do not use glass, china, or metal, as these hard surfaces can scratch your coins! Disposable food storage containers are perfect for this. Just don’t store your coins in them permanently. Add a small amount of mild dish-washing detergent to the container filled with warm water. Don’t overdo it—all you need is a tiny squirt.
4. Prepare Your Final Rinse Bath
Fill a second plastic container with distilled water for the final rinse. Although distilled water is by far the best, you can substitute hot running tap water.
5. Clean the Coins
Pick up the first coin, and immerse it in the soapy water. Gently rub both sides of the coin between your fingers, paying attention to any stickiness or gunk. Rub gunk near the edges away from the center of the coin, not into it. Always work in an outward pattern. Dirt and gunk near the edges should simply be made to go over the side with your thumb, not all the way across the coin. Don’t put all of your coins in the water at once! Do them one at a time. Otherwise, the coins will come in contact with each other and cause scratch marks on the surfaces.
6. Rinse the Coins
Rinse the coin under warm running water, gently rubbing until all soap residue is gone. Always remember, gentleness is the key! Don’t rub hard, and if you feel any grit, even light grit, don’t rub it into the coin because it will scratch the coin very easily. Instead, agitate the coin by moving it quickly in the water to dislodge the grit, touch it gently only if needed to free it up. Every motion you make with your fingers should be focused on not causing scratches to the coin’s surface.
7. Rinse Again
Swish the coin around in the distilled water to remove the chlorine residue and other contaminants that are found in tap water. Hold the coin by the edge and agitate gently. At this point, you should no longer touch the coin on its faces. Touch it only by the coin’s edge when using your bare fingers. If you must use tap water for the final rinse, then run the coin under fairly hot water.
8. Allow the Coins to Dry
If you use a distilled water rinse, you can set the coin on the towel to air dry. The coin should dry spot-free because distilled water is free of dissolved minerals and other impurities. If you have to do the final rinse in hot tap water, then gently pat the coin dry to help prevent spotting.
Note: Never rub a coin with a towel to dry it! Always pat it dry gently with a soft cloth towel or lint-free tissue.
9. Repeat Until Finished
Now wash the rest of your coins, one at a time, following Steps 5 through 8 carefully. If you run across a coin that needs to soak for a while to get clean, put it in the tub of water off to the side, so you don’t accidentally ding it with another coin in the tub.
10. Store Your Coins
Make sure your coins are completely dry before putting them away. Damp coins can suffer damage over time. Remember to always handle coins only by the edges. The only coins I ever touch the faces on are the ones I am about to spend!
Tips
- Never try to remove the natural oxidation from coins, such as the tarnish on silver coins. Tarnish on silver coins is called “toning” and the coin is worth more with the toning intact. Removing it will damage the coin’s surface and greatly reduce its value. In other words, you should never use dips, polish, or chemical solutions to clean your coins.
- If there is a gooey substance on the surface of the coin, it may be the residue left from tape. To remove the substance, use a small amount of rubbing alcohol to dissolve it. Do not use acetone because it is highly flammable.
If you’re a serious coin collector, there are professional services you can hire to clean coins in a way that won’t diminish the coins’ value. That being said, if you’re collecting just for fun and with no intention of one day selling or trading your coins, the steps below will get old coins gleaming.


